This Speaker Cleaner Sound Trick Instantly Fixes Your Laptop’s Muffled Audio
Laptop speakers often get dusty or blocked without you even noticing. This can make the sound muffled or unclear with the passage of time. Many people try to wipe the area but it doesn’t always help. You need a smarter way to clear the problem.
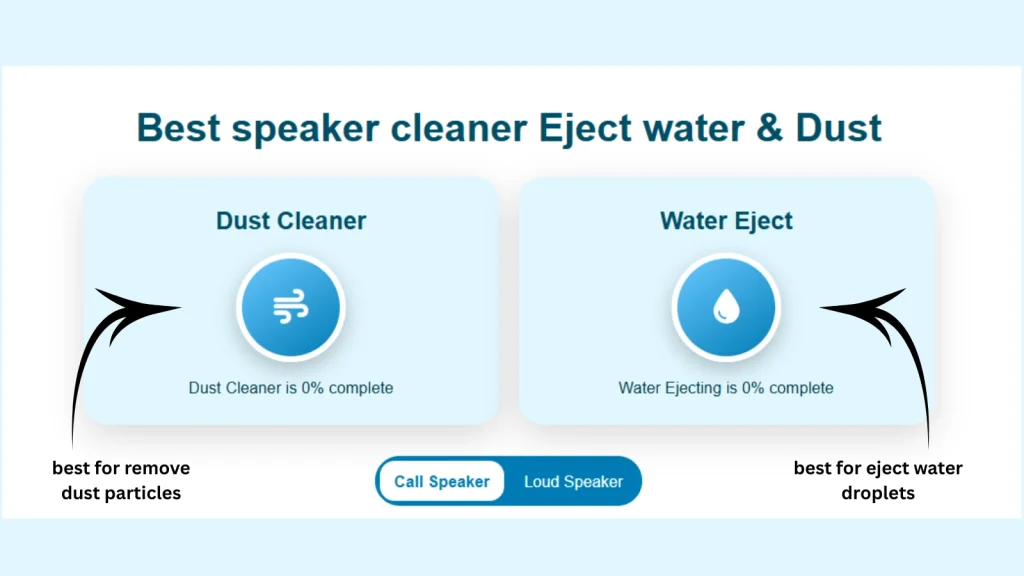
That’s where a cleaning sound comes in. It uses special audio to push out water or dust from the grill. This method is quick, safe and doesn’t need any tools. It’s perfect for anyone who wants a clean sound without risk.
Why Laptop Speakers Lose Clarity Over Time
Other factors besides dust and moisture can contribute to poor laptop sound. The audio quality is gradually impacted by a several common behaviors and surroundings. Knowing the causes helps you avoid problems in the future and know when to act. Here are a few major reasons:
Physical Blockage from Dust
Dust settles into grills over the time, especially if your laptop sits unused. It clogs the fine mesh and reduces sound flow. This result in dull and weak sound. The regular exposure to dusty areas speeds this up.
Moisture from Humid Environments
If you use your laptop in kitchens, bathrooms or outdoors, it can be exposed to moisture. Humidity seeps in and reduces sound clarity. This also increases the risk of corrosion. They often sounds distorted or quiet if they are damp.
Covering Vents or Grills
If you place your laptop on soft surfaces, it blocks the speaker holes. This muffles sound and traps heat. Both can harm your speakers over time. Always use it on hard and flat surfaces.
Playing Audio at Max Volume
The constant blasting audio at full volume stresses your audio units. It can wear down internal parts faster. Over time, this causes crackling or reduced performance. Keeping the volume moderate helps avoid damage.
DIY Cleaning Mistakes
Using sharp objects or liquids to clean them can do more harm than good. You might push dirt deeper or damage the mesh. These areas are delicate and should be handled with care. Sound-based methods are safer and more effective.
How Speaker Cleaner Sound Actually Works
The tool expels any water or dust that has become lodged in your unit by using particular sound frequencies. The particles inside the grill are shaken loose by these noises, which produce tiny vibrations. It’s similar to thoroughly cleaning your speaker without actually touching it. Simply play the sound and let it take care of the rest.
The way sound waves travel through surfaces and air makes this technique effective. They can gently push out debris or moisture at the proper frequency. It doesn’t void any warranties and is safe for your hardware. The best part is that results appear in a matter of seconds.
The speaker cleaner tool operates directly through your browser, so no app installation is needed. As long as your laptop can play audio, you can use it right away. This makes it a fast and simple solution for blocked sound.
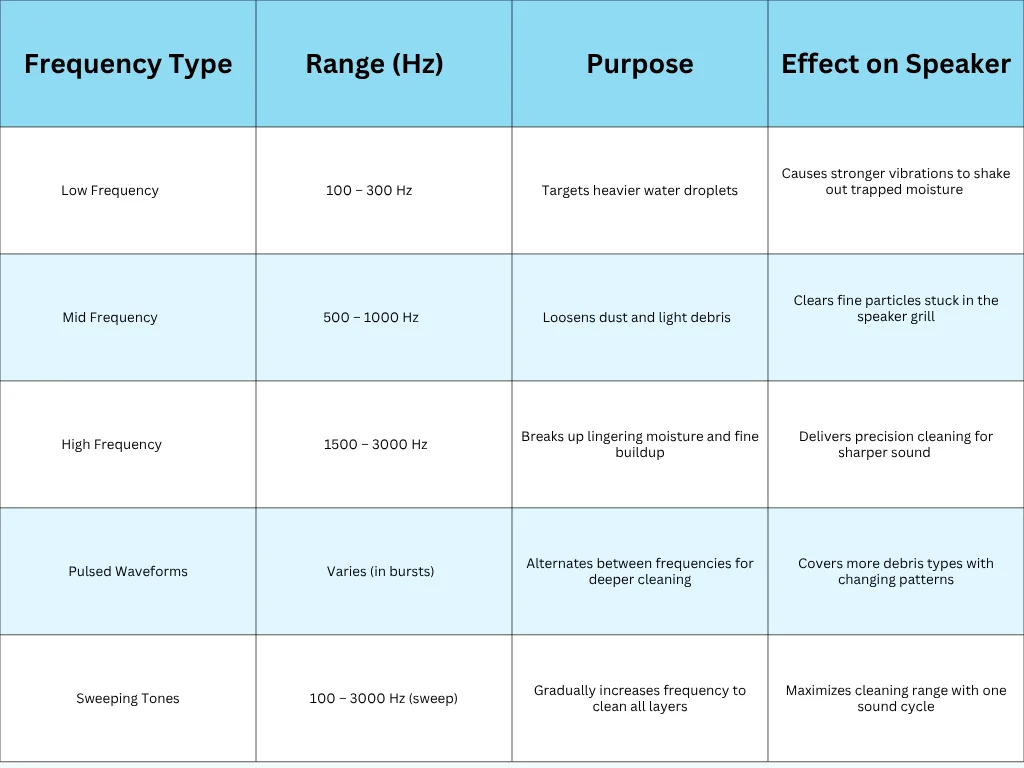
Frequency Types Used in Speaker Cleaning Tools
Different sounds serve different purposes. Low-frequency sounds (around 165Hz) create strong vibrations that are excellent for shaking out water droplets. Higher frequencies (tone sweeps) are used to try and dislodge lighter dry particles like dust, though they are generally less effective than water ejection.
System Requirements and Laptop Compatibility
Sound-based cleaning tools work on almost any modern laptop. A few basic system conditions can help improve performance. These tools rely on your laptop’s ability to play audio clearly and at a reasonable volume, so speaker functionality is essential.
Not Ideal For: Laptops with completely damaged or disabled audio units
The tool operates directly through your browser, so no app installation is needed. As long as your laptop can play audio, you can use it right away. This makes it a fast and simple solution for blocked sound.
How to Use It on Your Laptop
Using a cleaning sound on your laptop is pretty easy. All you need is a working internet connection and speakers that can still produce sound. There’s no app to install and the process takes just a few minutes.
Follow these steps:
Step 1: Open the Tool in a Browser
Launch Chrome, Firefox or Edge and visit the SpeakerFixer tool on web browser. Make sure your laptop volume is turned on and not muted.
Step 2: Set Volume to 50–80%
Adjust your volume to a medium-high level. Avoid using full volume to prevent stress on the speakers.
Step 3: Play the Cleaning Sound
Click the play button to start the cleaning frequency. You’ll hear a pulsing or vibrating tone. Let it run for 30–60 seconds.
Step 4: Repeat if Needed
If sound still feels muffled, you can run the sound again. You may also gently tilt your laptop to help any loosened moisture escape.
Step 5: Test Your Sound
Play music or a video to test if your audio unit sounds clearer. If the issue persists, they might need deeper cleaning or repair.
How Do External Devices Like HDMI or USB Audio Devices Impact Sound Output?
External devices such as HDMI cables or USB sound cards can override your laptop’s built-in speaker output. Your system may automatically route sound through the external device instead of the internal when they are connected. This makes tool seem ineffective.
For accurate cleaning results, always ensure audio is playing through the internal speakers. They should not be through headphones, monitors, or USB headsets. You can check or change this in your sound settings. The cleaning sound won’t reach and won’t have any effect until the wrong device is selected.
Conclusion
Keeping your laptop speakers clean is essential for clear audio. The safest way to do it is through sound-based tools. Unlike risky physical methods, these tools use frequency vibrations to gently remove trapped dust and water.
Using a speaker cleaner sound on your laptop might sound surprising. But these tools are often compatible and highly effective. With just a browser and working audio, you’re all set. It’s an easy and no-risk way to refresh your speaker without disassembling anything.
Frequently Asked Questions
How often should I clean my laptop audio units?
Experts recommend cleaning your laptop speakers once every 1–2 months using a soft brush or compressed air. This will prevent dust buildup that can degrade sound quality.
Can sound waves actually clear dust from them?
Yes. The high-frequency sound waves, especially in the ultrasonic range, can dislodge dust particles. Its effectiveness depends on the design and frequency accuracy. It’s generally best for light dust and not heavy buildup.
Is using compressed air safe for cleaning laptop speaker grills?
Yes, it is helpful if done correctly. Try to hold the can upright and use short bursts from a 2–3″ distance. Avoid continuous spraying to prevent moisture or propellant from entering them.
What is the ideal audio frequency range for cleaning laptop sound device?
Research suggests low-frequency tones around 165 Hz work well to shake loose moisture and dust from the grills, while ultrasonic frequencies (above 20 kHz) target finer particles.